Transforming a photo into an architectural work of art
By popular demand, I have put together a more detailed series of steps showing how I create house portraits. Of course it doesn’t mean it is the only way to do it, but it’s a way that I have found to be successful.
Here we go…
Step 1:
First I start with a good set of photos. Then it is a matter of going through them and selecting the best one to use as the main photo. I use all the photos of course but having the right main photo is vital. It should be at an angle that compliments the house and shows it’s architectural features. It also helps that it is free from obstacles and blockages. But this is not always possible.

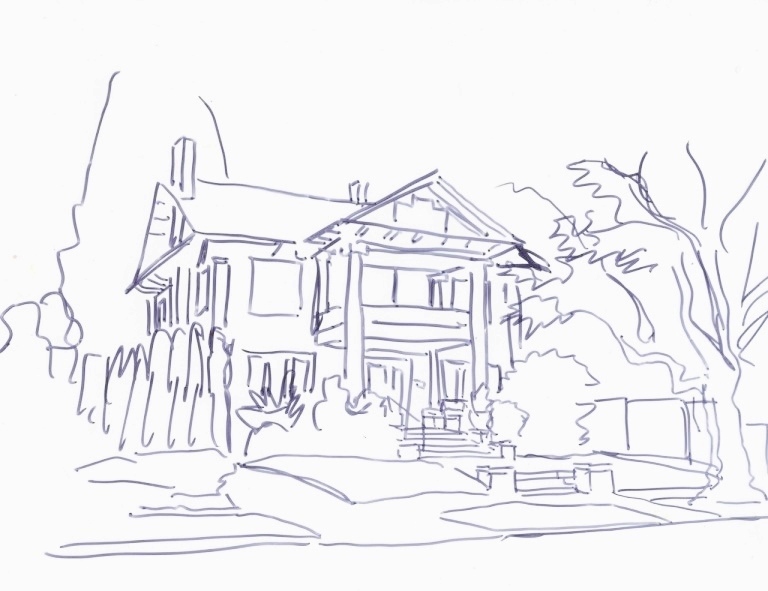
Step 2:
The next stage is a rough pencil sketch of the subject on the sheet of watercolor paper that I will use for the painting. I usually only take around 10 minutes on this step and I check it against my overlay to make sure it is correct at the end. If there are adjustments, this is the time to do them – while things can still be erased.
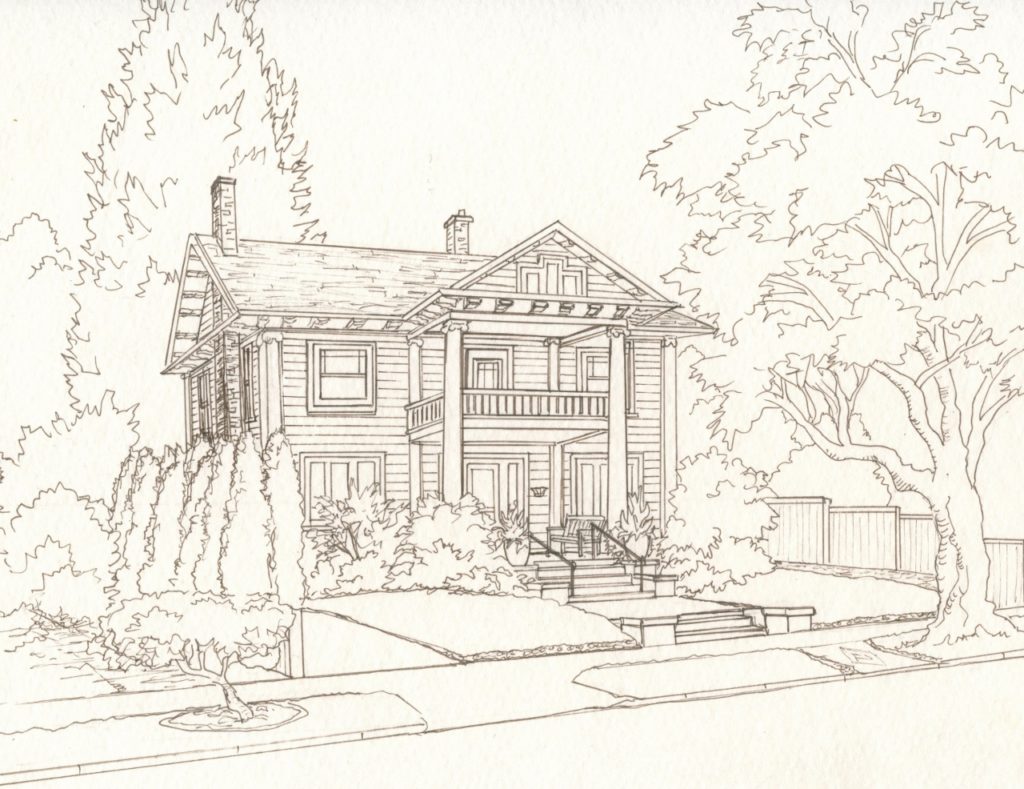
Step 3:
This is a much longer step. A detailed pen drawing of the home. This is where I pull out my set square to make sure the lines are straight. Not only do I include the main architectural features of the house with my pen, but also the finer details such as the wooden bench on the porch and the cool planters by the entrance. I use an archival quality, waterproof, artist pen. I don’t use black ink but prefer a dark brown as I feel it gives a softer look to the final painting. I use three different size tips. It’s very important to get these details right at this stage as it very tricky to try to change anything. I always take very close attention to the original photos of the house as I move forward with this step in order to prevent any mistakes.
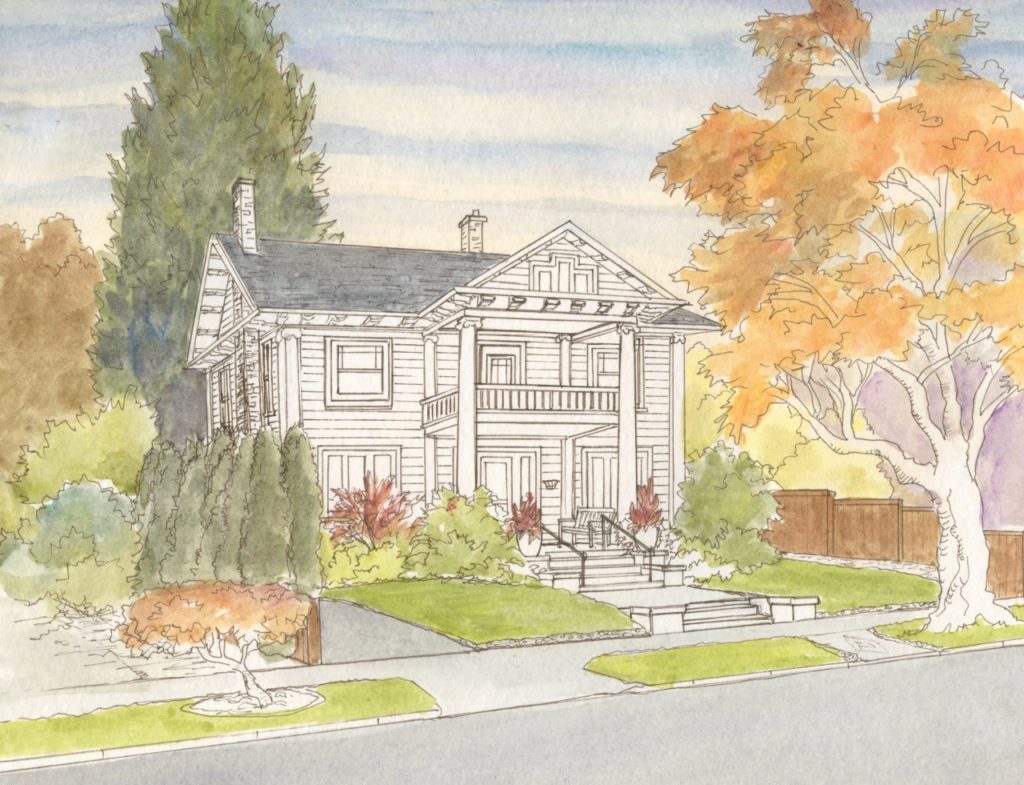
Step 4:
Now the fun begins! This is my favorite part. Along with the pen drawing, this stage takes the longest amount of time. Additionally watercolor paint is pretty unforgiving. This means that unlike oil or acrylic paints, where you can simply cover up mistakes or change something you don’t like by adding additional layers of paint, this is not possible – or at least extremely risky –when using watercolor. The way I explain watercolor to people, and even students I am teaching, is that instead of using white paint you are replacing it with water. This is also why watercolor paintings are so magical as there is a certain translucency once the paint is applied to the paper. Just like water itself is translucent and reflective. You apply the painting in layers. I always start with the sky and the main blocks of color as you can see here.
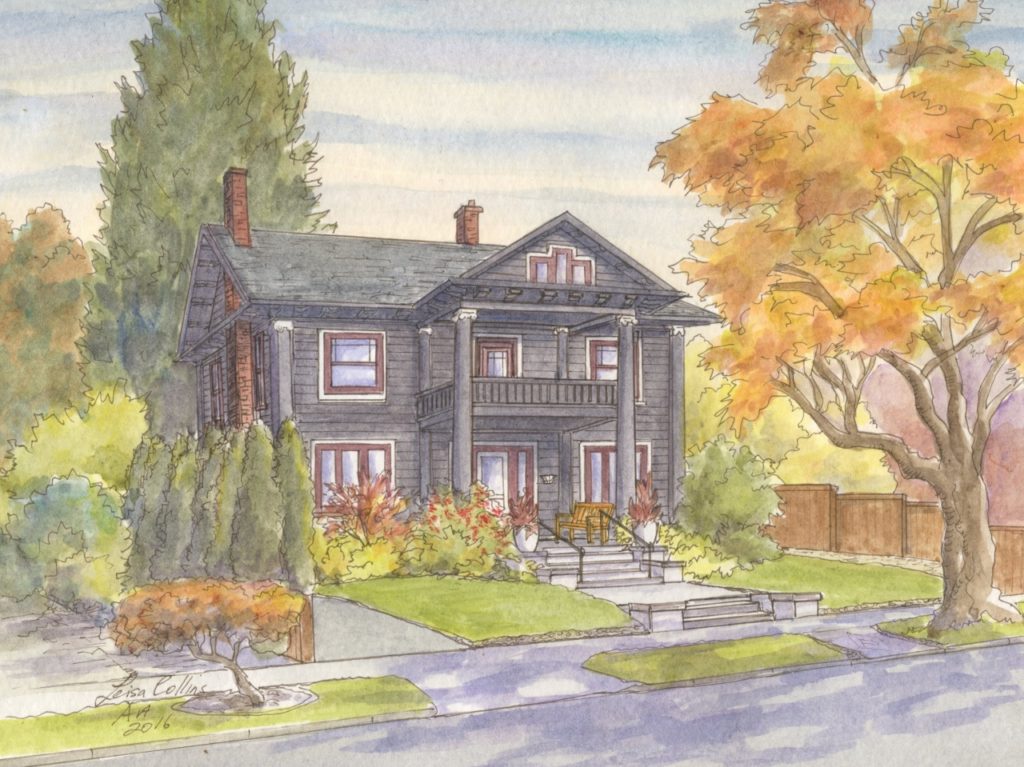
Step 5:
Now I concentrate on painting the house and start filling in the details . You can also see how I have added more fine points to the surroundings of the house. The last step is adding the final touches which includes the very small details and shadow to give the painting contrast. I love portraying homes on a bright sunny day, such as this one, so I add the shadows at the very end. Note the dappled shade from the tree in the foreground. Being that the light is coming from the right in this case, I have also added shadow on the right side of the house, under the eaves as well as under the top balcony and entrance way. This gives the painting depth and more of a three dimensional look.
I hope you have found this both informative and useful!
Leisa
